Building two sample apps using Hotwire and Flask
After covering up the basics on both Turbo and Stimulus, we’re good to start building something. I’ve used Python’s Flask micro-framework on the server.
The first application is an image loader, where we’re gonna see Turbo Drive, Frames, and Streams all in action. No javascript was used in this example. On the second app, we build an interactive tool for you to write a recipe, featuring a search field with autocompletion. In this example, we use a Stimulus controller, Turbo Drive and, Turbo Frames to incrementally update the UI.
Bear in mind that the approach I’ve used is not necessarily the “best”, as my focus was in demonstrating a couple of use cases in the simplest way I could. These examples were conceived to be used for educational purposes only.
All the code is available in this GitHub repository.
Project setup
The project uses python 3.8 and a Pipenv file is provided to ease the installation of dependencies. Just clone the repo, perform a pipenv install and you’re all set.
Each example is located within its subfolder and is a completely separate Flask application. To run the server, activate the pipenv environment, cd to the folder and, execute the flask run command.
Image loader with no Javascript
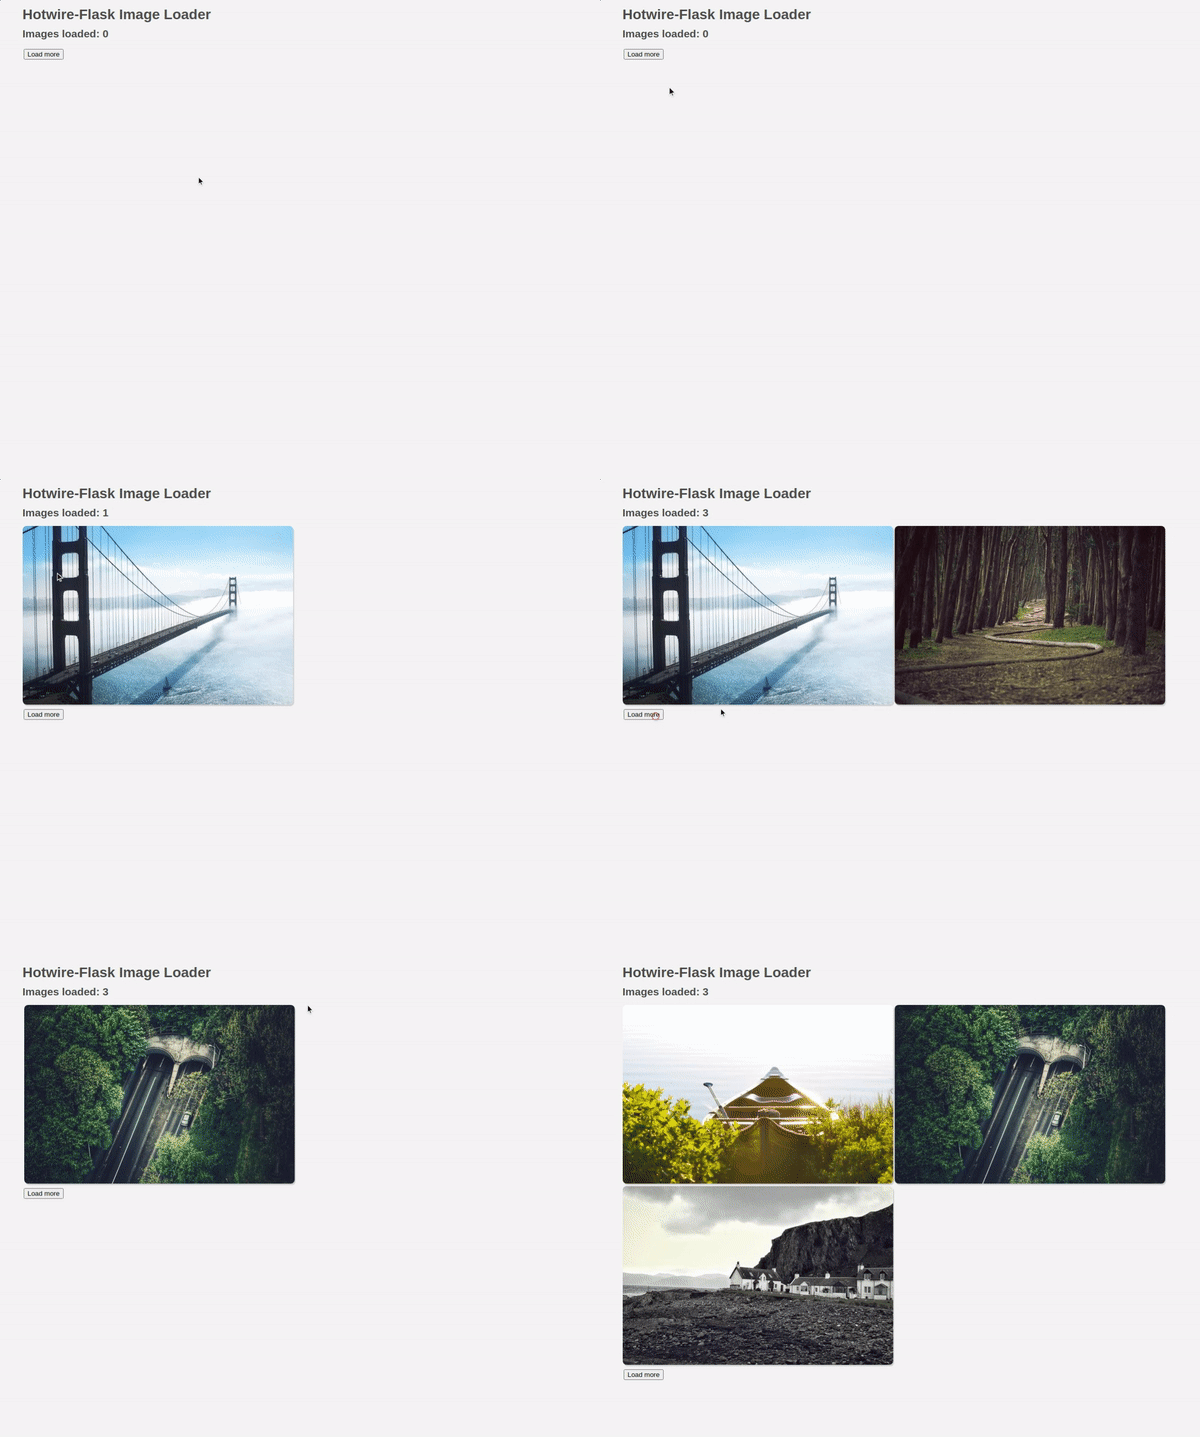
For the first example, I wanted to explore a simple case where Javascript is usually used for: dynamically pulling data from the server and appending it to the DOM. This application is composed of a button and a list of images. When the button is pressed, it triggers the process of loading a new image and adding it to the UI. The number of images is displayed on the top of the screen and it’s also kept within the server between page reloads.

The page is composed of the main HTML template and one partial as you’ll see below. Styles were omitted for clarity.
<!-- index.html -->
<h2>
  Images loaded: <turbo-frame id="counter">{{ counter }}</turbo-frame>
</h2>

<turbo-frame id="images">
  {% for seq in range(0, counter) %}
    {% include '_image.html' %}
  {% endfor %}
</turbo-frame>

<turbo-frame id="button">
  <form action="/add-image" method="post">
    <input type="submit" value="Load more">
  </form>
</turbo-frame>

<!-- _image.html -->
<turbo-frame id="{{ seq }}">
  <img src="https://picsum.photos/536/354?{{ seq }}" />
</turbo-frame>
The index.html file contains 3 Turbo Frames:
- One containing the loaded images count. The use of the frame here will allow us to update this value dynamically from the server afterward, using Turbo Streams.
- A frame for the placement of the images. It’s used both to render the initial page load, but also for rendering HTML on subsequent Ajax calls.
- Notice that the images are random, and will always change whenever the page is reloaded.
- And a frame for the form, which enables Turbo Drive on submission.
Now the python code for the server part.
sequence = 0

@app.route("/", methods=["GET",])
def index():
    return render_template("index.html", counter=sequence)

@app.route("/add-image", methods=["POST",])
def add_image():
    sequence += 1
    html = render_template("_image.html", seq=sequence)

    return turbo.stream([
        turbo.append(html, target="images"),
        turbo.update(sequence, target="counter"),
    ])
This code is pretty straightforward, with the root path providing the initial page load, and one additional method for adding new images. When the user clicks on the Load more button, an Ajax request is performed to the /add-image method. This method responds with a stream of two actions: one for appending the new image within its own frame, and another one to update the incremented value of images loaded.
Recipe creator with auto-completion
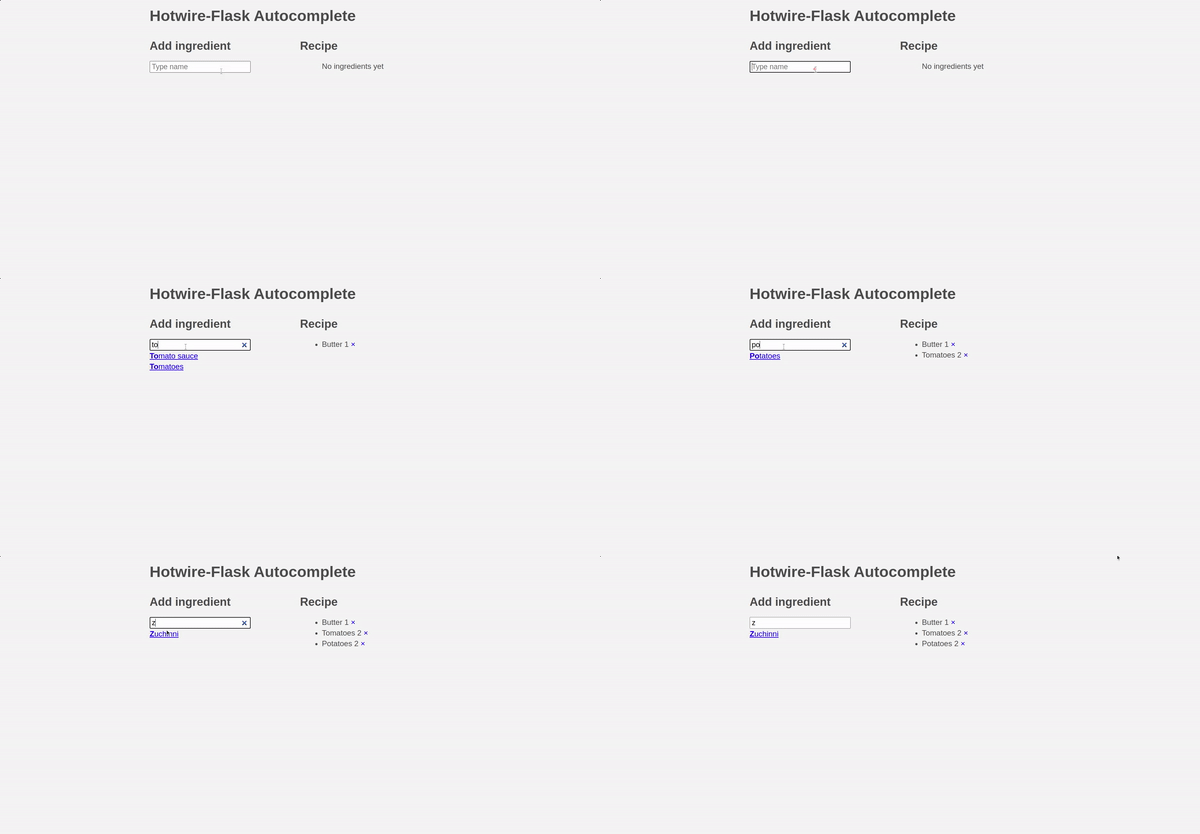
In this example, we’ll be building an interactive recipe creator, where the user is allowed to select from a previously defined set of ingredients and add them to a list as they please. The ingredient selector is composed of an input field equipped with auto-completion for a better user experience.
The search input field fetches ingredients from the server on the fly as you type. These ingredients are shown below the field, and when the user clicks on one of them, the ingredient is added to the recipe on the right. If you click on the same ingredient more than once, the amount is added up to the list on the recipe. The panel on the right shows the list of currently selected ingredients and has a small button allowing the user to remove each of them.

The HTML section of the code:
<!-- index.html -->
<div class="flex-container">
  <div class="flex-item">
    <h2>Add ingredient</h2>

    <div data-controller="search"
        data-search-url-value="{{ url_for('search') }}?q=%s">
      <div>
        <input type="search" data-action="search#findResults" />
      </div>
      <div>
        <turbo-frame id="search-results" data-search-target="results">
        </turbo-frame>
      </div>
    </div>
  </div>

  <div class="flex-item">
    <h2>Recipe</h2>
    <ul>
      {% include '_recipe.html' %}
    </ul>
  </div>
</div>
The interesting part here is the use of a Stimulus controller to allow the fetching of auto-completion suggestions as to the user types in an ingredient’s name. The
data attribute data-controller="search" on the outer div makes the binding to the controller’s Javascript object.
On the input field, a callback method is set to be called when the user types something using the attribute data-action="search#findResults". Finally, a Turbo Frame was placed to hold the search results and a target data attribute was set allowing access to it from the controller.
Now for the HTML partials:
<!-- _search.html -->
<turbo-frame id="search-results">
{% for ingredient in ingredients %}
<div>
<a href="{{ url_for('add', ingredient=ingredient.name) }}"
data-turbo-frame="recipe">
<strong>{{ ingredient.strong }}</strong>{{ ingredient.non_strong }}
</a>
</div>
{% endfor %}
</turbo-frame>
<!-- _recipe.html -->
<turbo-frame id="recipe">
{% for ingredient, amount in recipe.items() %}
<li>
{{ ingredient }} <span>{{ amount }}</span>
<span>
<a href="{{ url_for('exclude', ingredient=ingredient) }}">
<button type="button" aria-label="Close">
<span aria-hidden="true">×</span>
</button>
</a>
</span>
</li>
{% endfor %}
</turbo-frame>
As we can see, the search-results frame is used to render the auto-completion suggestions. Each item is an anchor targeting a method for exclusion of ingredients on the server. When the user clicks on an ingredient, we want the recipe to be updated, instead of the current frame. To achieve this, we set a data attribute data-turbo-frame="recipe" to indicate that the Ajax response from this call should be rendered within the context of another frame, called recipe.
On the recipe frame, there’s a list of currently selected ingredients, also showing the quantities for each of them. A link for exclusion is set to call the respective method on the server.
Let’s proceed and see how the Stimulus controller was put together. Note that I used a slightly different syntax for the controller class, because it was written directly in the body of the HTML.
application.register("search", class extends Stimulus.Controller {
  static get targets() {
    return [ "results" ]
  }

  static get values() {
    return { url: String }
  }

  findResults(event) {
    const q = encodeURIComponent(event.target.value)
    const url = this.urlValue.replace(/%s/g, q)
    this.resultsTarget.src = this.urlValue.replace(/%s/g, q)
  }
})
This may seem confusing at first, but let’s break it down. At the top of the class, the targets and values statements define the elements and attributes that we’re interested in. The results element being the Turbo Frame used for displaying the search results, and the url value being a template string holding the URL along with the query string that the server expects.
When the user types a new character, the findResults() method is triggered. It uses the url value provided from the server along with the input string provided by the user in the field, to build a new src attribute for the Turbo Frame. Turbo will detect this change on the element and trigger an Ajax call to the server. Now the server responds with a HTML segment matching the Turbo Frame’s ID and bingo, we have a list of ingredient suggestions on the screen.
In the server-side code, just simple methods for rendering the HTML templates, and a search method that filters on the list of ingredients available.
recipe = defaultdict(int)

@app.route("/")
def index():
    return render_template("index.html", recipe=recipe)

@app.route("/add/<ingredient>")
def add(ingredient):
    recipe[ingredient] += 1
    return render_template('_recipe.html', recipe=recipe)

@app.route("/exclude/<ingredient>")
def exclude(ingredient):
    del recipe[ingredient]
    return render_template('_recipe.html', recipe=recipe)

@app.route("/search")
def search():
    q = request.args.get("q")

    ingredients = [
        {
            "name": ingredient,
            "strong": ingredient[:len(q)], # Make typed chars bold
            "non_strong": ingredient[len(q):], # The rest of the string
        }
        for ingredient in INGREDIENTS
        if q and ingredient.lower().startswith(q.lower())
    ]

    return render_template('_search.html', ingredients=ingredients)
Wrapping up
As we go through these examples, we can see how the design can be HTML-centric when using Hotwire. Of course, both examples were very simplistic cases of applications, but it’s noticeable that a lot can be achieved by using just plain HTML and a few sprinkles of Javascript.
Building these apps helped me a lot to sink in the concepts. I hope reading about it was worth it for you too. Project-based learning is a quite effective way of internalizing concepts, and writing about what we’ve learned helps even more.
Last but not least, I just wanted to mention that both application ideas were inspired by discussions I’ve read on Hotwire’s official forum. It’s a really nice place to discuss ideas regarding how to use this project.